The complex world of US tax accountants
US tax accountants face several challenges in their profession: keeping up with the constantly changing tax laws and regulations, increasing pressure to provide more value-added services to clients, such as financial planning and advisory services and unrealistic client expecations, who do not understand the complexities of the tax code, or who may have unrealistic expectations about what their tax accountant can do. Finally, tax accountants must navigate a highly competitive marketplace, with many firms offering similar services. To stay competitive, tax accountants must provide exceptional service, maintain strong relationships with clients, and continually upgrade their skills and knowledge.
To help tax accountants stay competitive, MyDocSafe has built a client portal experience to streamline the client onboarding and project management process. It is one of the first types of portal configuration built by MyDocSafe, which is celebrating its 10th anniversary this year.
The Case Study
In this Case Study we will walk you through the experience of both the accountant (let’s call her Liz) and her client (let’s call him Daniel) to illustrate how much can be achieved through a very simple interface. Here simplicity is a guarantor of durability. The client portal experience goes from portal registration, providing required data, accepting a quote, signing an engagement letter, and paying for the service and approving the final tax return.
We have asked our clients which element of the platform stands out as most valuable. To our surprise, it was not automation, security or comprehensive nature of the service but the ability, when filling out new tax questionnaires, to import data submitted in previous years. Our clients view this feature as key because it makes each new instruction that bit easier to get. A client will think twice before switching to another professional as retyping pages of data is not a fun task.
Let’s get into the details then. Below we will describe the user experience for both the accountant and their customer, step-by-step.
Accountant (call her Liz)
Adding a new client.
After logging in, Liz goes to Portals and Clients
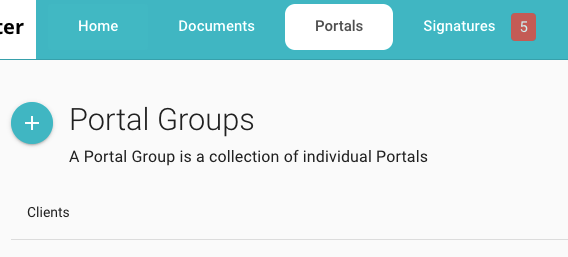
select ‘Add New Portal’ and fills out the invitation. The “Optional invitation message” can be saved as a template so it does not need to be retyped each time.
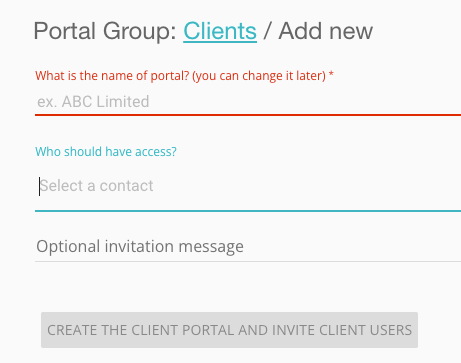
If writing to a prospect by email, Liz can copy and paste the portal self-signup link which she enabled in MyDocSafe settings, which will let her clients get onboarded without her having to invite them to the portal directly.

Client (call him Daniel)
Client signs up
The client clicks on the link sent by Liz directly by email or via MyDocSafe and sets up login credentials. Then, Daniel enters the portal. This is the dashboard Daniel will use to navigate between different tax years, engagement letters and bills.

Daniel has access to several portals at MyDocSafe, as his lawyer, wealth manager, and his daughter’s school all use it to communicate confidential information. These portal are accessible through a Switch button visible on the top of the screen. Each portal is ring fenced and encrypted, shows different colours, brands and buttons.
Client fills out the tax questionnaire
Liz instructed Daniel to start a new tax questionnaire for 2024, by clicking on “Add Tax Questionnaire” button or the ‘+’ button:
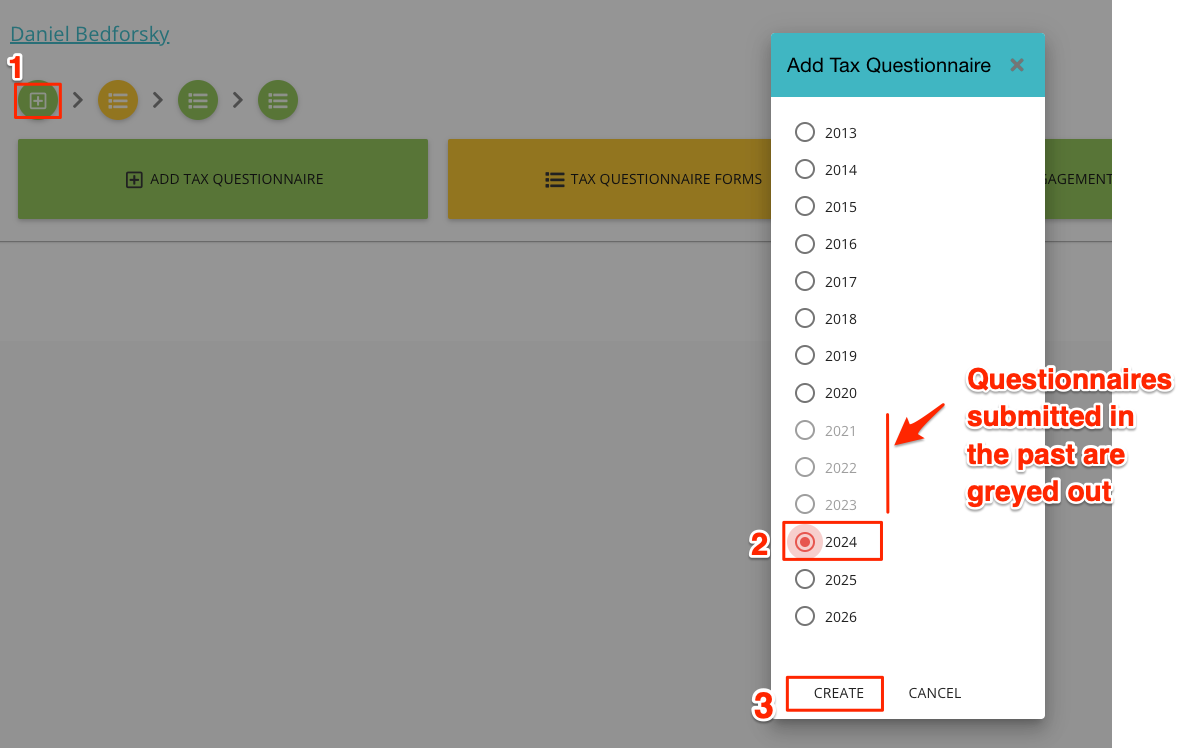
And clicks ‘create’. Daniel enters a subfolder for 2024 with three buttons: tax questionnaire form, make a payment, and view/approve tax return.

The only active button is ‘Tax Questionnaire Forms’, so Daniel clicks on it. Daniel enters THE form, which looks rather intimidating at first:

It includes a number of sections which may require some time to fill out:
- Personal details
- Tax information
- Foreign corporations
- Employer information
- Taxes paid and itemized deductions
- Non US financial account
- End of Year documents
However, Daniel does not need to fill them out in one sitting. The ‘Save and Close’ button allows Daniel to stop the process at any time without losing the data. Daniel actually used Liz in the previous year so can find ‘Import Data’ button rather useful. He can import data from the previous year with a click of a button
If available, client imports data from a previous submission
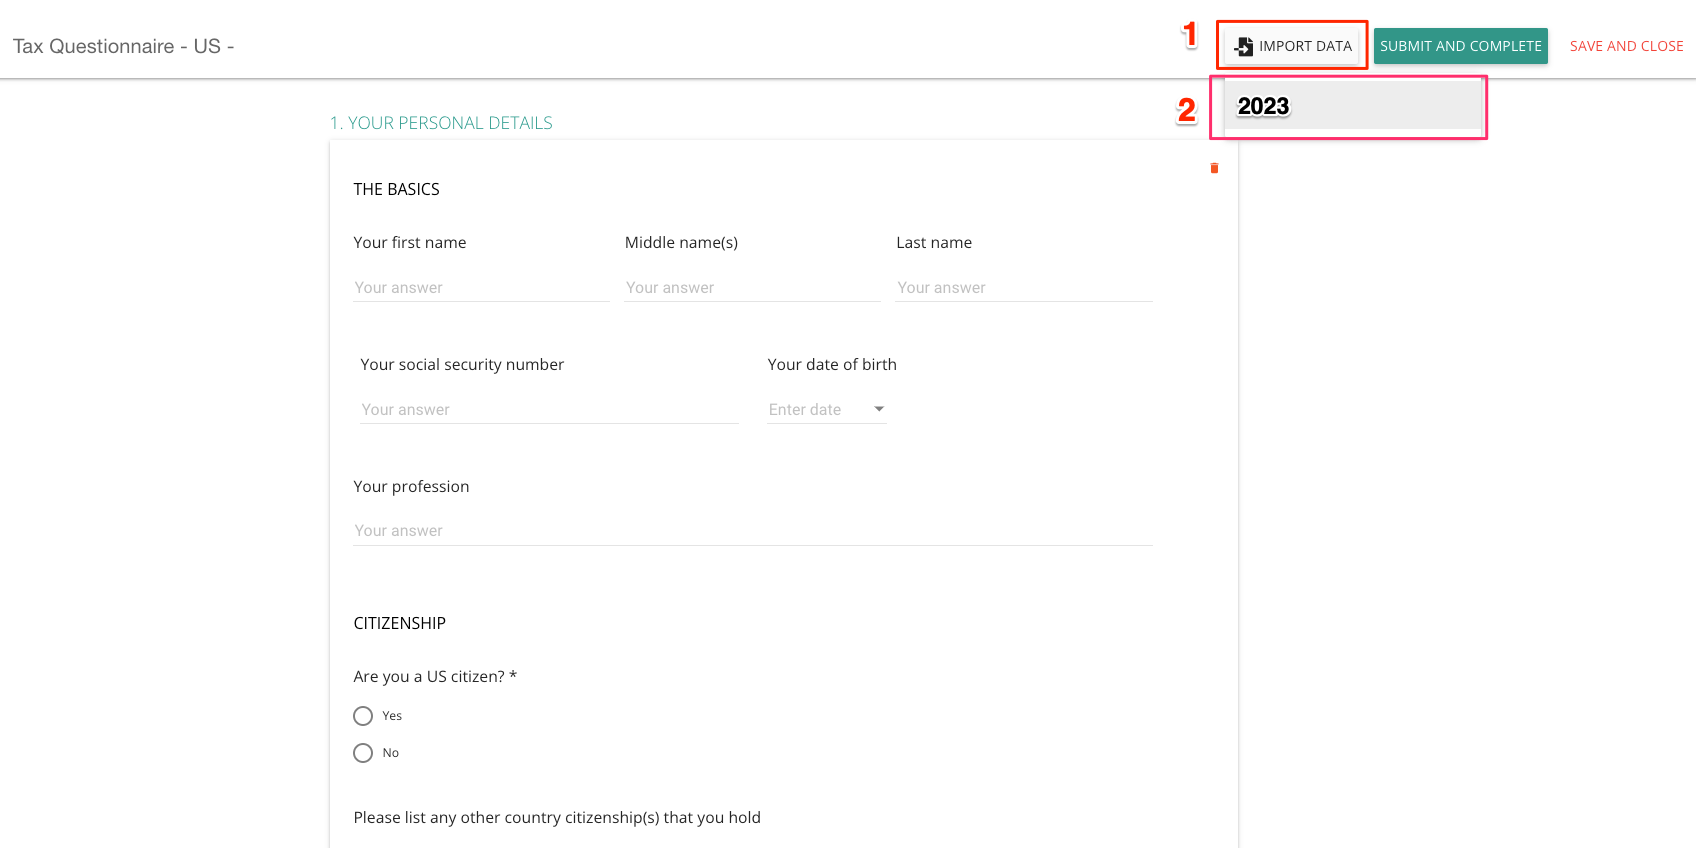
The form is pre-filled with last year’s answers, letting Daniel skip sections which have not changed.
Accountant reviews the data
Once Daniel submits the form data, the “Tax Questionnaire Forms” tab turns green to mark that it has been completed. Daniel logs out of the portal and waits further instructions.
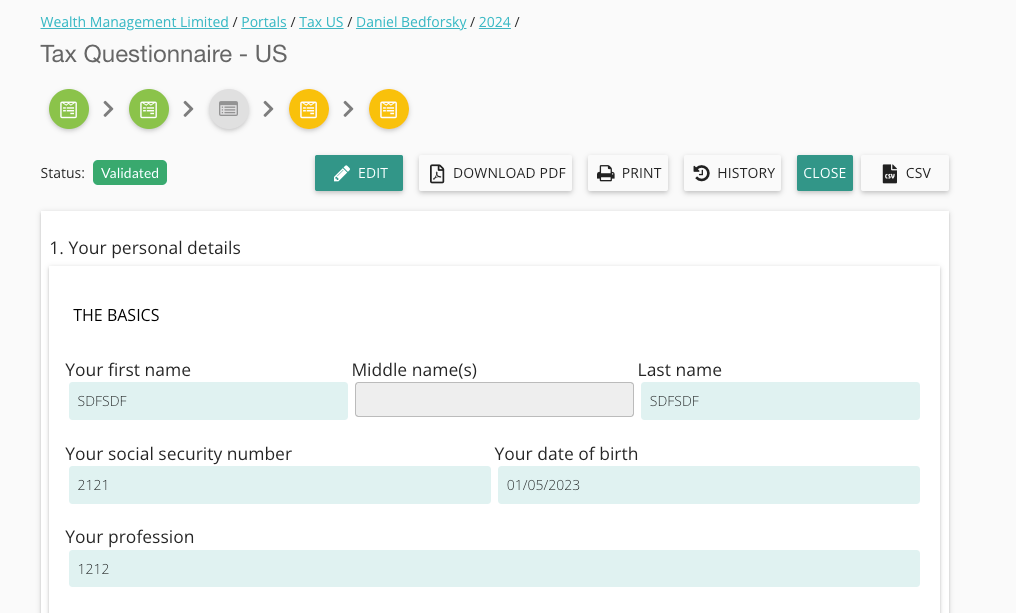
Next Liz receives a messaging notifying her that a new questionnaire is ready for review. She gets into the questionnaire straight from the Home page:

And reviews it, then downloads the PDF of it for her records.
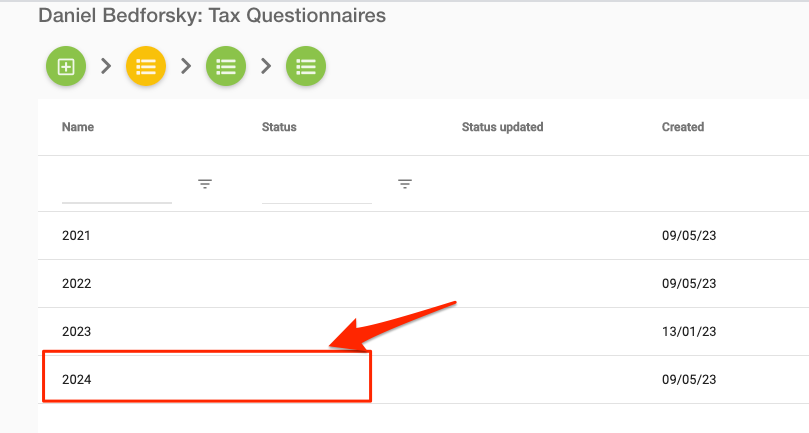
After reviewing the questionnaire she is ready to offer her engagement letter to Daniel. She goes back to the Portal dashboard
Accountant creates a quote and an engagement letter.
And starts the process to configure and send a new Engagement Letter. She does this by clicking on the ‘add engagement letter’ button.

Which takes her to the Engagement Letter workflow:

The first step is to select one or more services, either by setting them manually or choosing them from a pre-defined list:
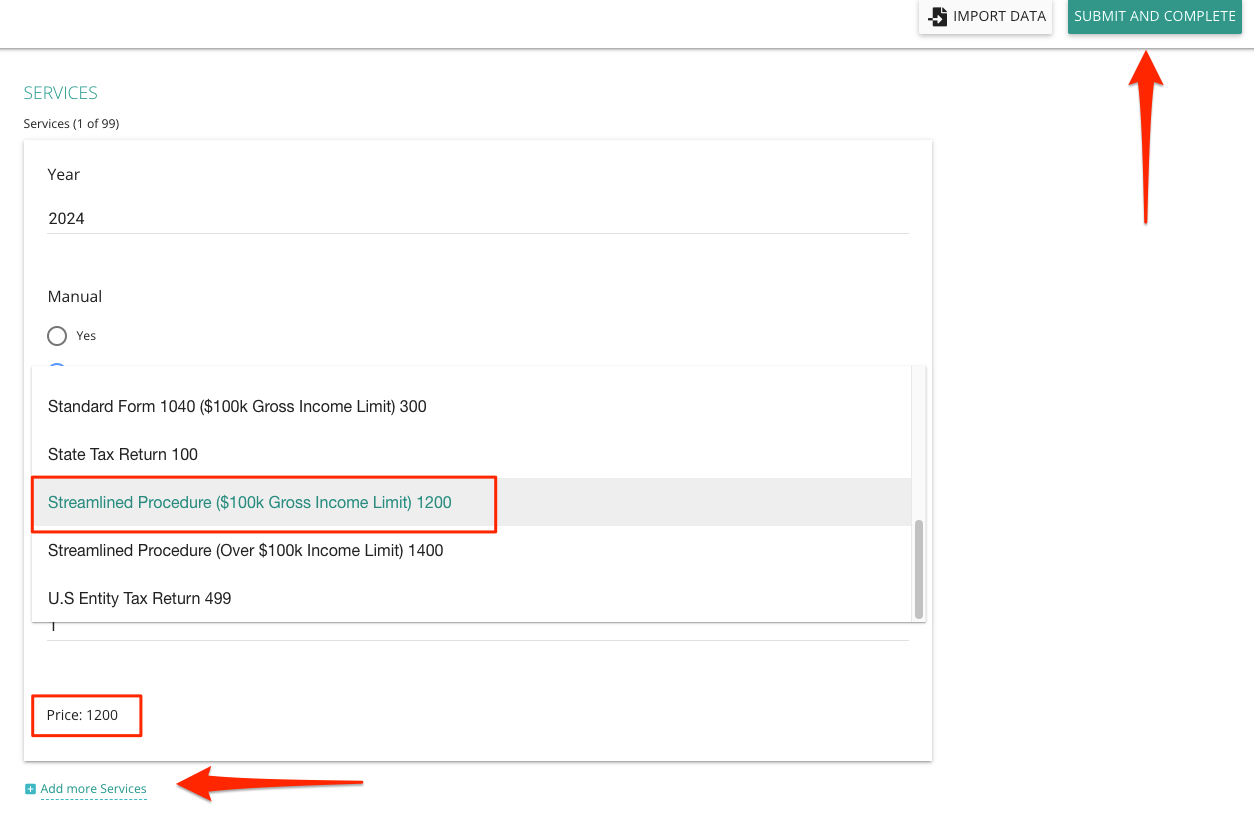
After saving the services, the second step is to preview the engagement letter.

The engagement letter shows up in a viewer with included services, prices and client information.
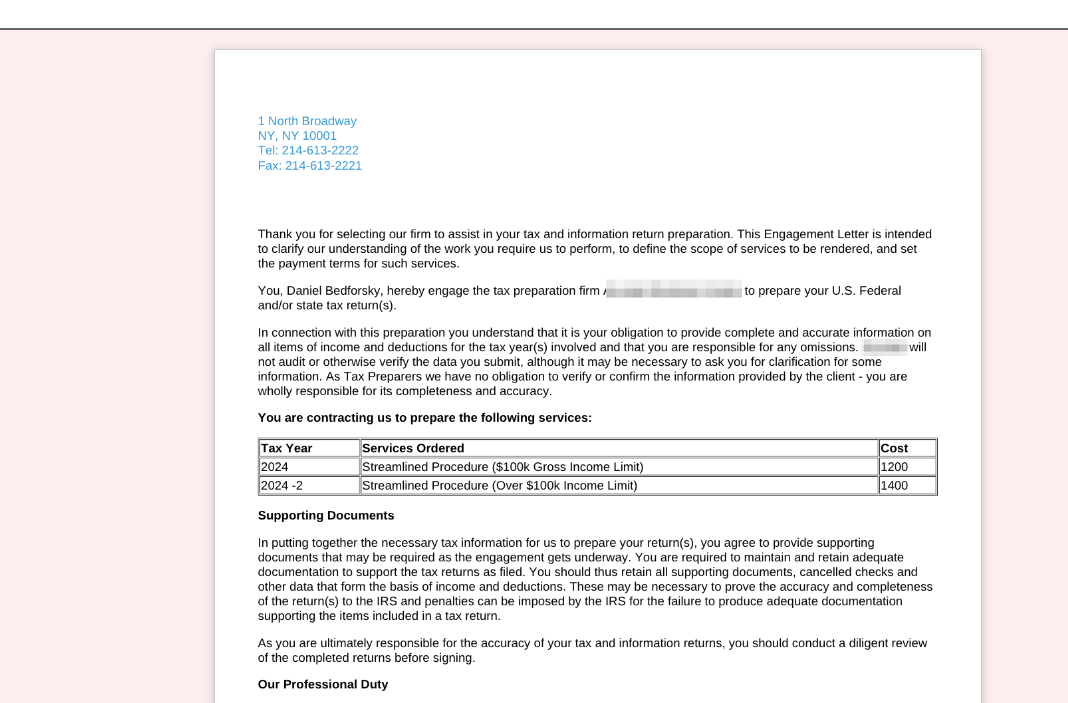
If the letter looks alright, Liz closes this window
Next, she clicks “Send Engagement Letter” button

and confirms her action.
Client signs the Engagement Letter
We now switch to the client view. Daniel receives an email with a request to review and sign the Engagement Letter
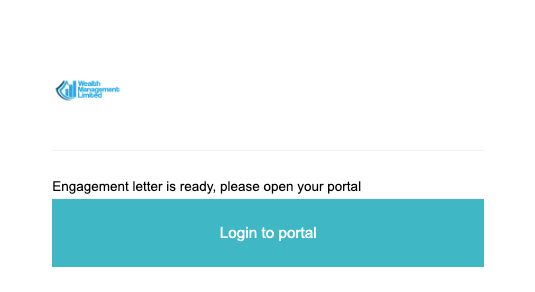
He clicks on the button in the email and logs into the portal
He then clicks on the “Sign Engagement Letter” button
The document opens up, he reviews it and signs

He can then logout of the portal. Liz receives a notification that her client signed the Engagement Letter so she can start her work. The signed Engagement Letter is stored in the portal and accessible to both parties.
Accountant starts working on the tax return
Liz can now start working on the tax return. When she is finished and is ready to send it for client’s final approval, she logs back into Daniel’s portal, opens the 2024 Questionnaire and clicks “Upload Tax Return”

which leads to a simple form
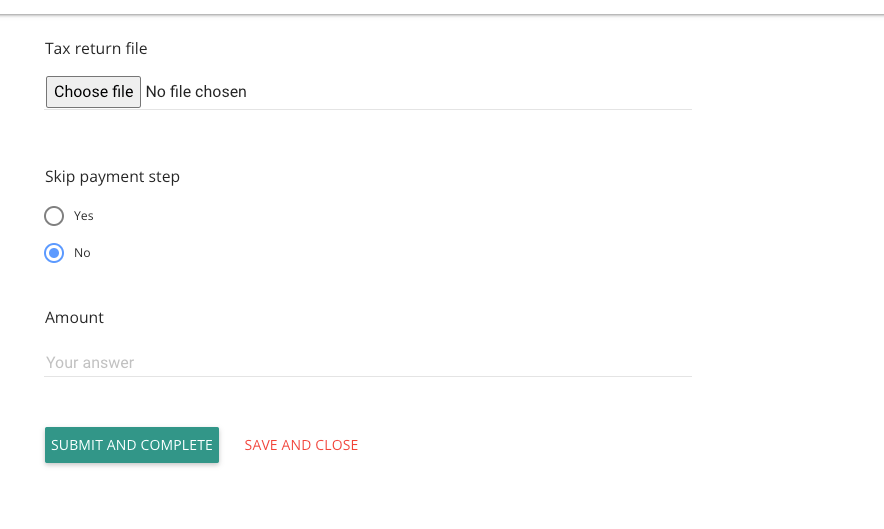
where she can drag and drop the Tax Return and specify the amount she wants to charge the client.
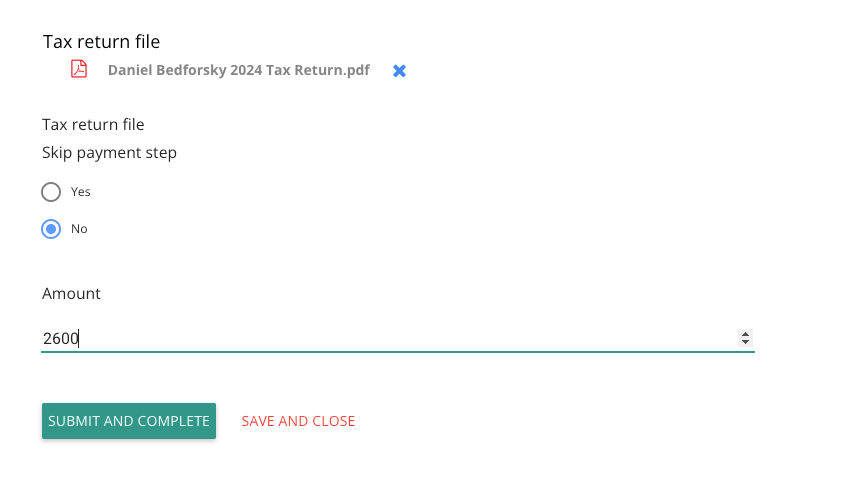
She then waits for the client to respond (the ‘Tax Return Approved’ button remains greyed out to indicate that her client is still to sign it.)
Client pays and approves the tax return
Switching back to Daniel. Daniel receives an email
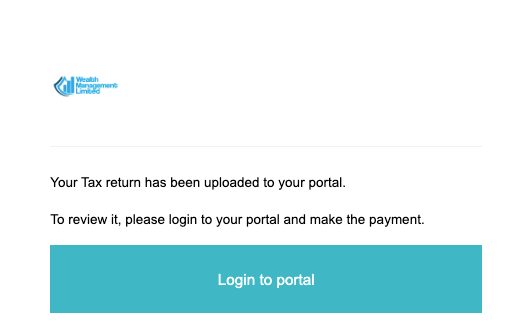
And logs back into the portal. He is required to make the payment before seeing the finished tax return. He clicks on the “Make a payment” button:

and confirms the amount:
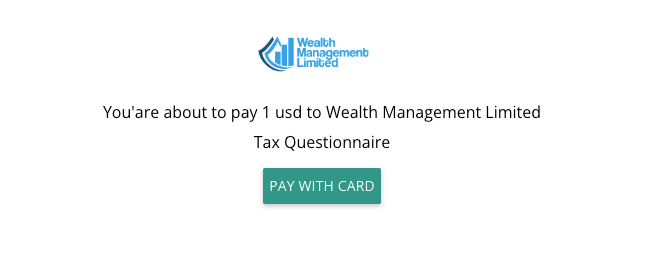
Daniel proceeds to make a payment with his credit card (MyDocSafe integrates with Stripe). After that he can review the return and approve it. Once approved Liz receives a confirmation that she is now ready to file it on behalf of the client.
This completes the process.
Conclusion
The standardization of this simple workflow as well as its scalability proved durable and useful. We are now upgrading the user experience to a more modern platform, which should simplify things further. If you are a tax accountant and would like to share your experience with a similar process, please contact us at customerservices@mydocsafehq.com. If you are a US tax accountant interested in giving your clients the above experience or a version thereof, please contact us at sales@mydocsafehq.com (yes, we can add ID verification checks and more complex data onboarding features).
If you are a member of
- American Institute of Certified Public Accountants (AICPA)
- National Association of Tax Professionals (NATP)
- National Society of Accountants (NSA)
- Institute of Management Accountants (IMA)
contact us to hear about our special offers.

